
Quick answer
Go to the official NBI Clearance Application Portal, register or log in, complete your profile, click Apply for Clearance, choose the government ID you will bring, select a branch and schedule, pay the fee, then visit the branch with your reference number, receipt and two original, unexpired government-issued IDs.
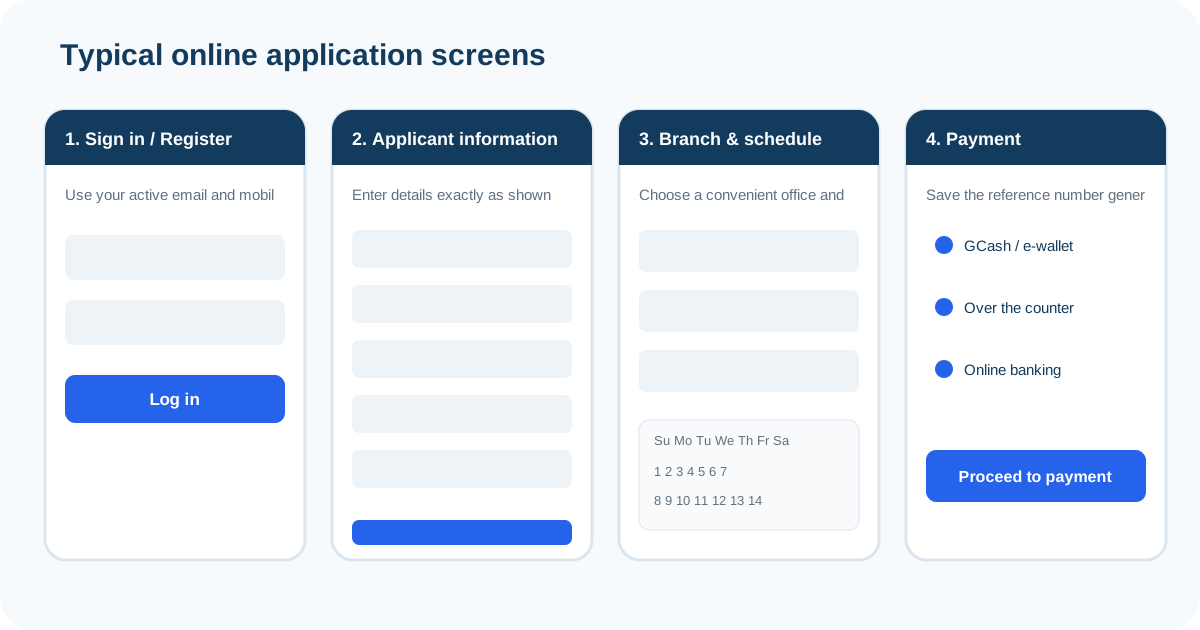
Before you start
- Use an active email address and mobile number because account registration uses an OTP.
- Match your name and personal details to your IDs exactly.
- If you are applying under the First-Time Job Seeker program, use the dedicated FTJS facility instead of the normal route.
- Do not pay through a person, fixer, social-media account or unofficial lookalike site.
Step-by-step NBI Clearance application
1. Register or log in
Create an account on the official NBI Clearance portal. Keep control of the email address and mobile number used for registration because OTP and account recovery can depend on them.
2. Complete the Applicant Information Form
Fill in all required personal, family and education/employment details. Review the spelling before saving. A mismatch between the portal profile and the IDs you present can delay processing.
3. Apply for Clearance
Select the valid government ID you plan to bring. This step connects the online transaction to the identity documents you will present at the branch.
4. Choose a branch and schedule
Select the NBI branch that is practical for you and choose an available AM or PM slot. Branch options are controlled by the live NBI system.
5. Pay and save the reference number
The current NBI how-to guide lists a ₱130 basic fee plus a minimal e-payment charge of around ₱25–₱30. The system generates a reference number that you should save or screenshot.
6. Visit the selected branch
Once the transaction is marked PAID, bring your reference number or QR code, proof of payment and two original, unexpired government IDs. NBI staff capture your photo, fingerprints and electronic signature, then verify the record.
What happens after biometrics?
| Status | What usually happens |
|---|---|
| No HIT | After verification, proceed to printing and release. |
| With HIT | Return on the date provided by the branch so the possible match can be reviewed manually. Current NBI guidance describes a usual 5–10 working-day return period. |
| For Quality Control | Follow the branch instructions for the required interview or additional verification. |
What to bring
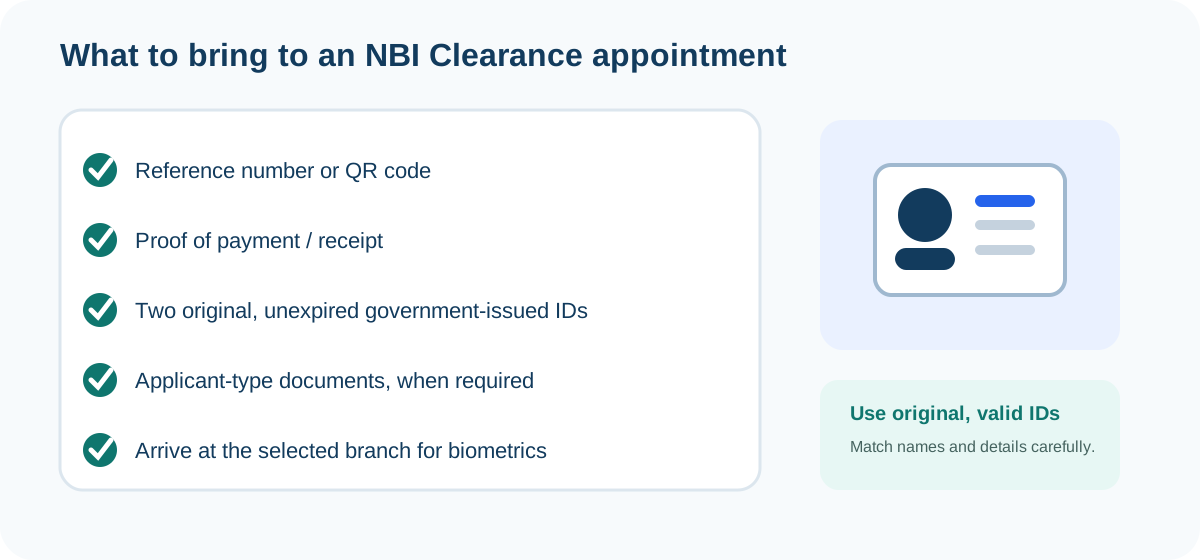
For a standard online application, prepare your reference number/QR code, payment proof and two valid original IDs. First-Time Job Seekers need their program-specific documents; applicants abroad use the mailed-clearance requirements.
NBI Clearance application checklist before you click Apply
A smooth NBI Clearance application starts before you reach the branch. Make sure the contact details on your account are active, your name is spelled the same way on the portal and on the IDs you will present, and the branch you choose is practical for you to visit. A simple typo can create unnecessary correction work later.
Account and profile checks
- Use an email address and mobile number you can still access.
- Review your full name, date of birth, place of birth and civil-status details before saving.
- Do not create repeated accounts just because a transaction is delayed; use the official account-recovery path first.
- If you qualify for the First-Time Job Seeker program, use that dedicated route from the beginning.
Payment and appointment checks
- Generate the reference number from your own official transaction.
- Use only the payment choices shown by the official portal.
- Save the payment receipt and reference number.
- Recheck the branch name before you travel, especially if you chose a location you have not visited before.
What happens inside the NBI branch?
After you arrive with a paid transaction and the correct documents, the branch process centers on identity confirmation and record checking. NBI guidance describes biometric capture of your photograph, fingerprints and electronic signature, followed by verification of your information. If the search is clear, the application can move to printing and release. If the system returns a HIT, the clearance is held for further review.
Why accurate profile information matters
The person at the branch is not starting from a blank form. Your online application already contains the information that will be associated with the biometric record. That is why the NBI tells applicants to review profile details carefully and make sure the spelling matches the IDs they will bring.
What “No HIT” means in practice
No HIT means the NBI record check did not require the additional manual review associated with a possible match. It does not mean the online application alone created the certificate. Standard applicants still complete the branch steps for photo, fingerprints, signature and release unless they are using an eligible renewal route that specifically avoids a branch visit.
NBI Clearance online application mistakes to avoid
Using a lookalike website
Always check the domain before entering account information or paying. The genuine application portal is under nbi.gov.ph. An independent guide can explain the process, but it should never pretend to be the government transaction system.
Typing details differently from your IDs
Minor name and birth-detail differences can create delays. Copy formal identity information carefully instead of relying on memory.
Losing the reference number
The reference number ties your payment and branch visit to the online application. Save it in more than one safe place.
Paying a fixer
No outside person can legitimately promise a guaranteed appointment slot, a cleared HIT or a special government fast lane. Pay only through channels connected to your official transaction.
Following the wrong applicant route
A first-time job seeker, an applicant abroad and a standard local applicant can have different requirements. Start from the route that actually fits your situation.
Using an old fee screenshot
Fees and portal screens change. The amount generated by the live NBI transaction is more useful than an old tutorial screenshot.
NBI Clearance application FAQs
Can I apply for NBI Clearance completely online?
The normal new-application flow starts online, but standard applicants still appear at the selected branch for biometrics, identity checking and release. Eligible renewal routes can be different.
Do I need two valid IDs?
Current NBI guidance for the standard branch process says to bring two original, unexpired government-issued IDs.
What is the NBI Clearance reference number for?
It identifies your transaction for payment and branch processing. Save it as soon as the system generates it.
What if I get a HIT?
Follow the return date given by the branch. Current NBI guidance describes manual review and commonly mentions a return period of around 5 to 10 working days.
Is NBI Clearance Help an official NBI website?
No. This is an independent informational guide. Official applications and payments are completed through NBI channels.